
For anyone who is new to, or interested in OAuth and the Amazon Echo, this is a quick and easy to follow demonstration that will walk you through how to get ‘Account linking’ to work with your Alexa and Facebook accounts.
Intro
The first step will be to configure a basic Facebook application, before moving on to configure your Alexa skill, so that an Amazon service can connect to Facebook to receive an access token. When the token expires, the Amazon service will handle it by using a refresh token to request a new access token. Please note that this is only a basic skill, and any code is purely to show you how things work, and may require modification to integrate it into an actual skill.
By the end of this tutorial you should be able to read your Facebook feed, and ask Alexa to write a post to your wall.
All code, Utterances, and Intent schema can be found in the following Github.
Setting up Facebook application
The first thing we need to do is create a Facebook application, this allows us to interact with the Facebook API, and log in.
The first step in creating a Facebook application is to go to developers.facebook.com, and click the ‘Login’ button in the top right hand corner. Once you have signed into your account, the ‘Login’ button displays your information and allows you to see any apps you already have, or create new ones. For the purpose of this tutorial we are going to create a new app. Click ‘Add a New app’, you should see something like the following popup:
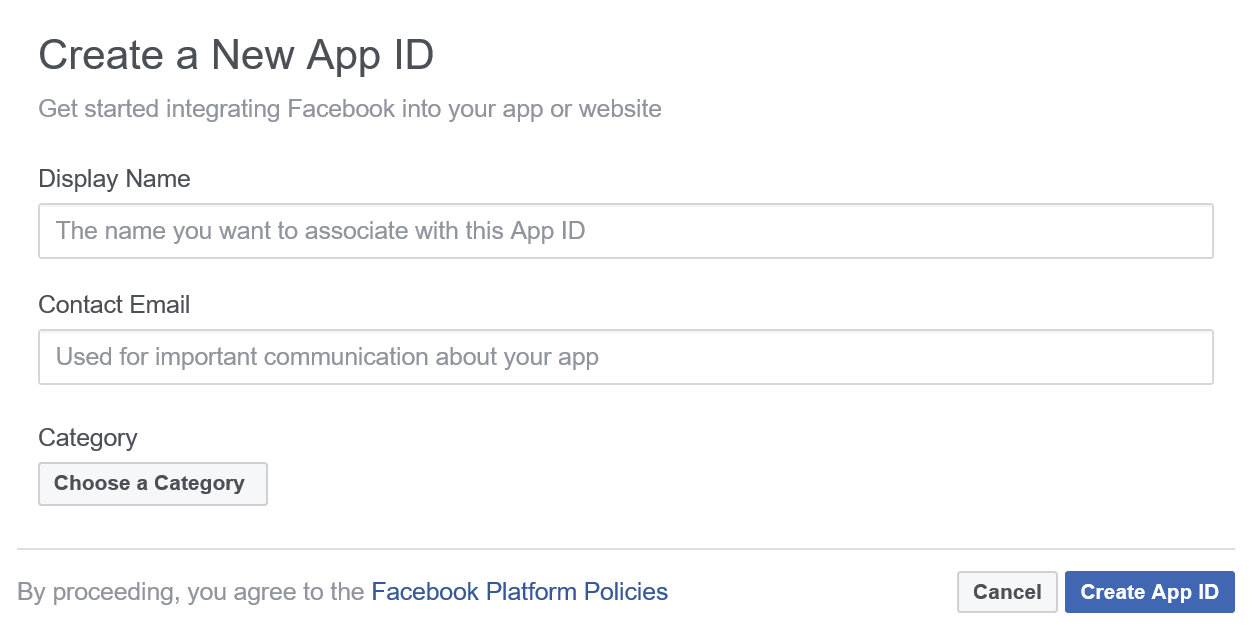
You will need to fill out this popup form with an app name and a contact email address, and select a category from the dropdown menu.
After this has been completed, you will be presented with the following web page:
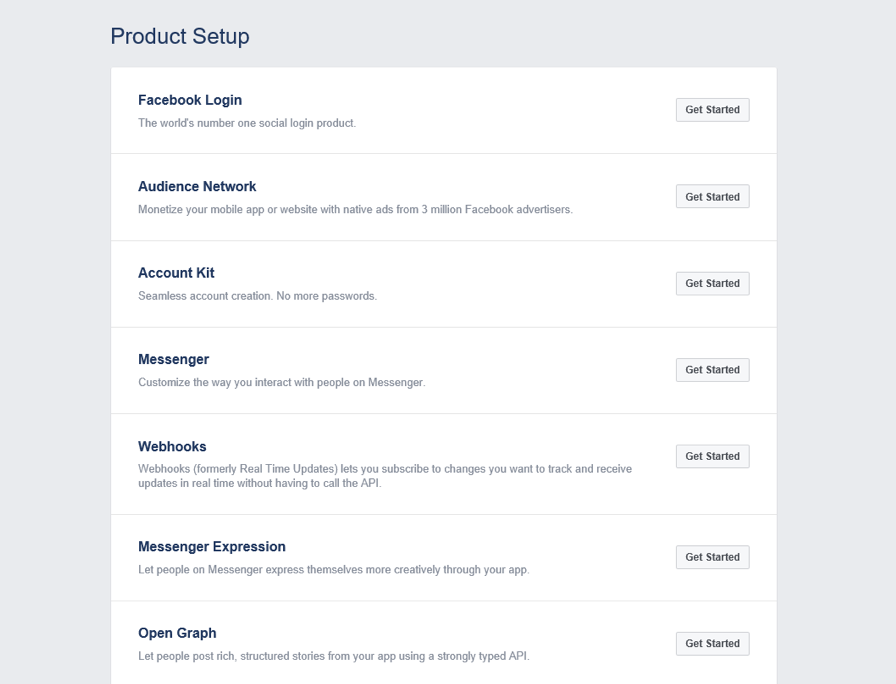
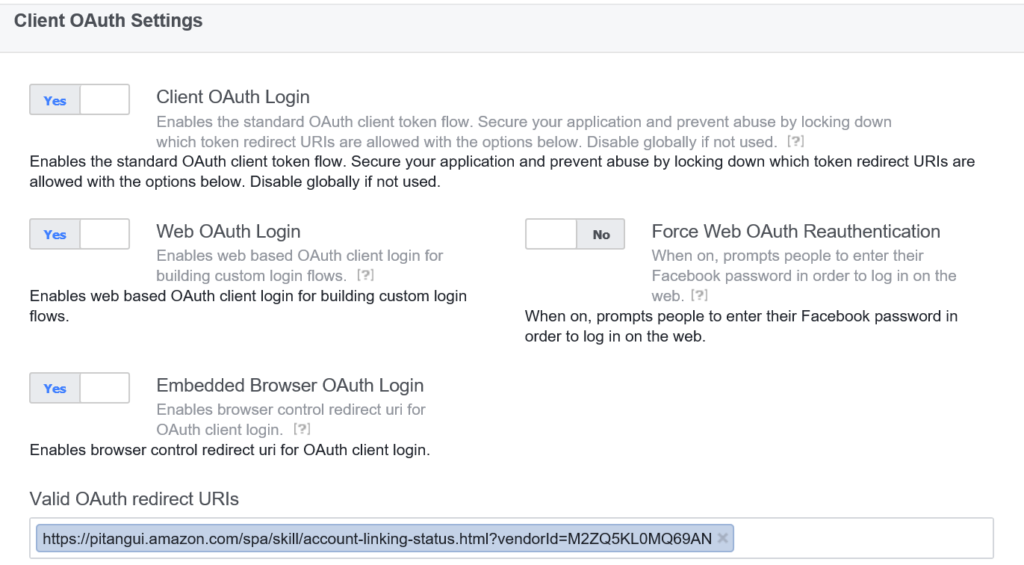
The only product we will need for this tutorial is ‘Facebook Login’, so next we can click the ‘Get Started’ button on the righthand side. The next pages holds the OAuth login setting containing two fields we need to change. First, add a ‘Valid OAuth redirect URI’ that we acquire when we create a new skill in the Amazon developer console; we will come back to this. Second, we want to enable the ‘Login from devices’ toggle button, so that it displays ‘yes’. Now save the changes.
Once these changes are saved, we need to create a new skill in the Amazon developer console. Sign in, and select ‘Alexa’ in the top navigation panel.
Configuring the Alexa Skill
Once the Facebook application has been set up, we need to configure the Alexa skill. First step, select the ‘Alexa Skills Kit’ option, and click ‘Create a New Skill’; which is located on the top right hand side of the page. Once selected, this should walk you through the setup of a skill. Continue to fill in all the details for your skill, and in the ‘Configuration’ section we want to select yes to ‘Account Linking’, which will open up a whole new section:
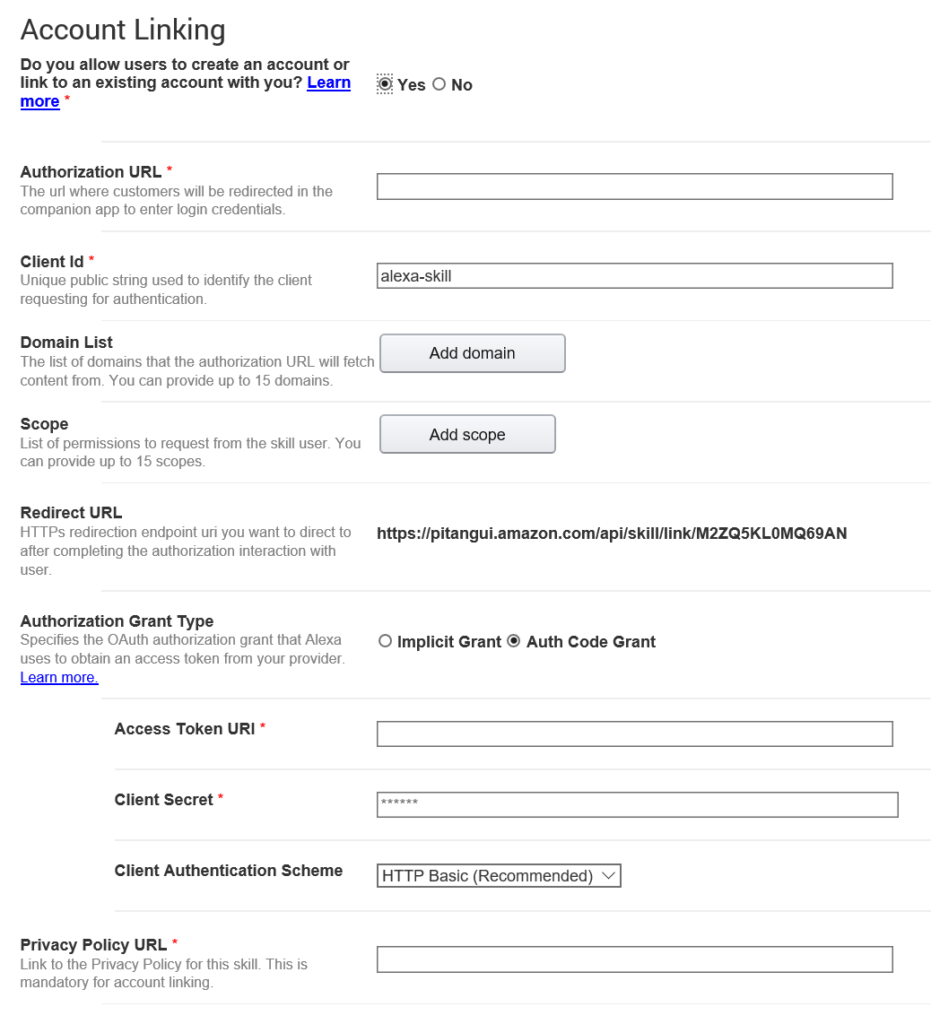
As you can see in the image above, we have a ‘Redirect URL’. Copy this over to the ‘Valid OAuth redirect URI’ section on our Facebook app page we created earlier, and save the changes. Moving forward, all configuration will be added into this page, so let’s go through the settings one by one:
Authorization URL: This is a URL string which is supplied by facebook, It is a generic URL and some values will need to be added. The values you need to replace are highlighted in red. There are two values, the first is a client ID, this can be found on the Facebook app page, where it is referred to as App ID. The second is a redirect URL which can be found on the Amazon Configuration page.
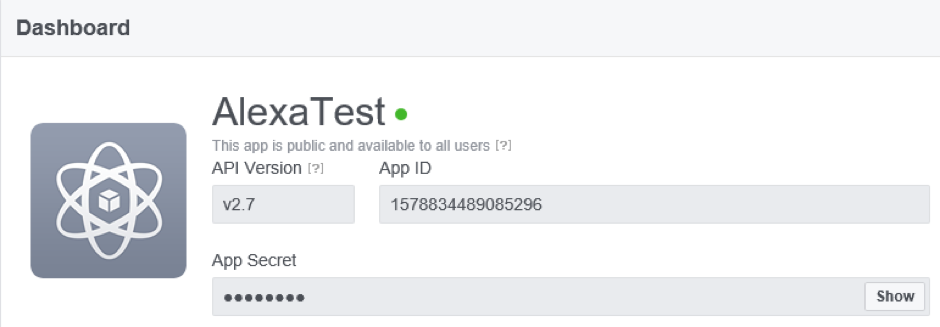
Client ID: This is a string value which can be found on your Facebook App settings page. However Facebook refer to it as an App ID.
Domain List: Is a list of domains, which the Alexa skill is expecting to interact with. For the purpose of this tutorial I only added a single domain to the list:
Scope: This is a list of permissions given to your skill once you have signed into your Facebook account. The user who is signing into their Facebook account will be shown a list of scopes they must agree to before these permissions are granted. A full list of scopes can be found here. For experimentation I used the following:
- public_profile
- user_about_me
- user_posts
- user_friends
- publish_actions
Redirect URL: This is supplied by Amazon, and should be copied from your Amazon configuration page to your ‘Valid OAuth redirect URIs’ field on your Facebook app. It is also needed as part of the Authorization URL (see above section).
Authorization Grant type: As we want the access token to be handled by Alexa, including refreshing the access token, we are going to select Auth Code Grant. This opens up another three fields that must be completed.
Access Token URI: URL where the access token can be updated, in our case we are using Facebook so we can use the URL:
https://graph.facebook.com/v2.3/oauth/access_token
Client Secret: This can only be retrieved by going to your Facebook app settings page and is referred to as the Facebook app secret, you must have to sign in to see it. It is also worth noting that every time a scope is changed, you must re enter this app secret.
Client Authentication Scheme: For the purpose of this tutorial there was no need to change this from the default ‘HTTP Basic’
Privacy Policy URL: Finally you must provide a URL linking to your Privacy policy.
A full review of these details can be found on the Amazon tutorial page:
Building the Skill
How to build a skill is out of scope for this tutorial, however some informative and helpful tutorials can be found here.
Let’s have a quick look at the code, and see how we can use the access token.
'NewSession': function () {
        accessToken = this.event.session.user.accessToken;
        if (accessToken) {
            FB.setAccessToken(accessToken);
            console.log("HAVE ACCESS TOKEN : " + accessToken);
            this.emit(':ask', welcomeMessage, repeatWelcomeMessage);
        }
        else {
            this.emit(':tell', noAccessToken, tryLaterText);
        }
    },
Here we can see a handler, which is run every time a new session is started. As you can see we can get the access token by calling the following code:
accessToken = this.event.session.user.accessToken;By using the API we can cut the amount of code needed to be writen to complete this tutorial, so accessing our feed (assuming you have a valid access token) can be done using two lines of code.
Enabling the Skill
It is also worth noting that in order to get an access token, and to be able to test your skill, you will need to enable your skill using the companion application. Once here you are able to select the ‘Skills’ navigation item on the left hand side.

At the top of this page you have an option to select ‘Your Skills’. Once this page has loaded up you can enable your new skill. You should see a Facebook page asking for you to sign in. Once signed in, you will see that the Alexa service was able to authenticate using your Facebook app.
Next Steps
With your Facebook account linked to your Alexa skill, you should now be able to get data from your Facebook feed and have Alexa read the last three posts. You should also be able to ask Alexa to Post a predefined message to your Facebook wall! The full documentation for Facebook Graph API can be found here. Once your account is linked you can get any data from a Facebook account, as long as you have set the correct scopes in your Amazon configuration page. It is also worth noting that although this is a Facebook tutorial, the same process can be used to link your Alexa skill to any account protected using OAuth.


